


FlutterでTwitterAPIを使う
ここでは、FlutterからTwitterAPIを使う方法を紹介していきます。
例えば、ツイート検索アプリやTwitterクライアントアプリを作ったりする場面があるでしょう。
そのような、TwitterAPIを利用したアプリ開発に役立ててください。
Twitter API
Twitterは開発者向けにAPIが公開されています。
このAPIを使うことでプログラムから投稿したり、タイムラインを取得したりできます。
https://developer.twitter.com/
App
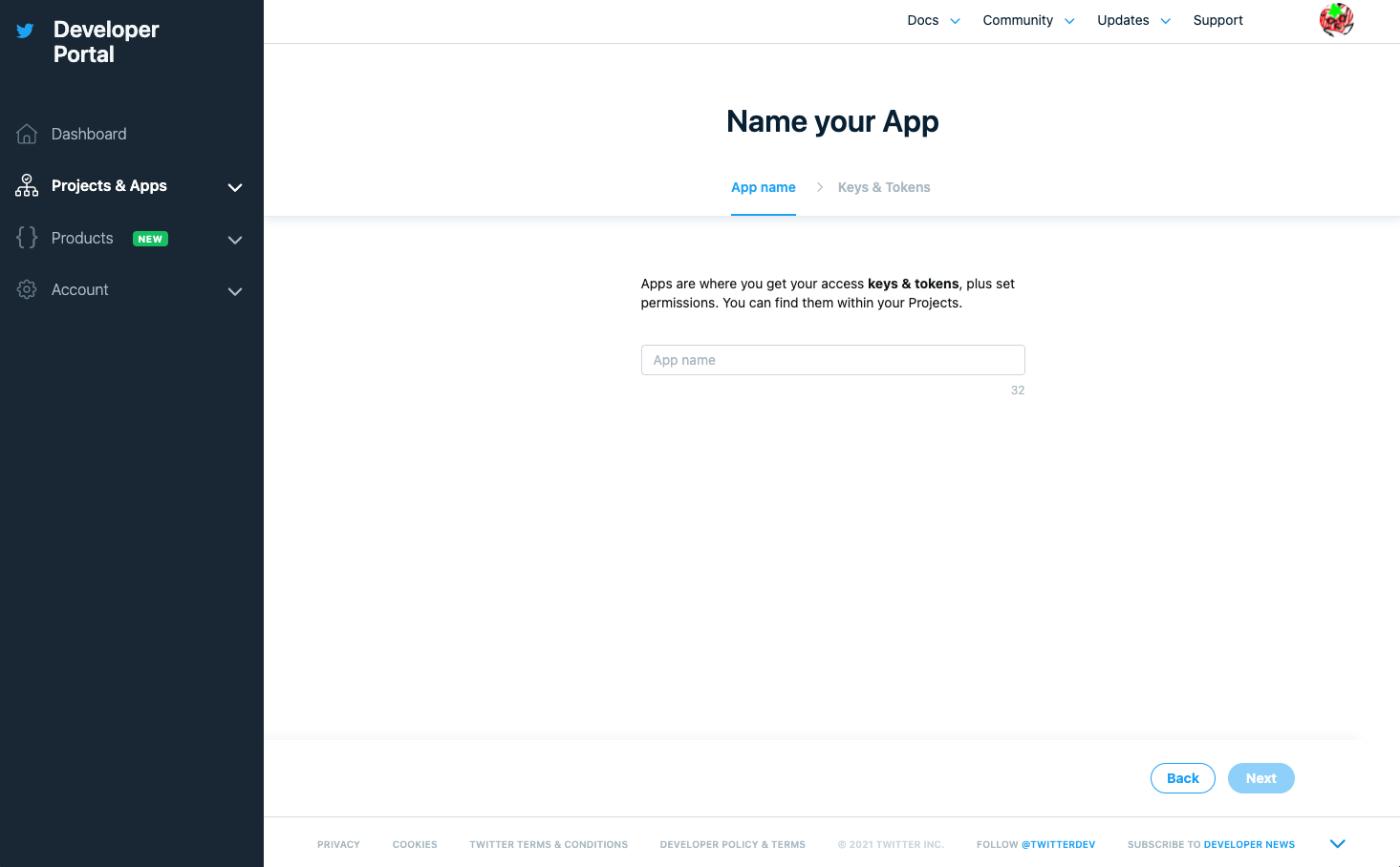
TwitterAPIを利用するには、DeveloperPortalからAppを作成し認証情報を取得する必要があります。
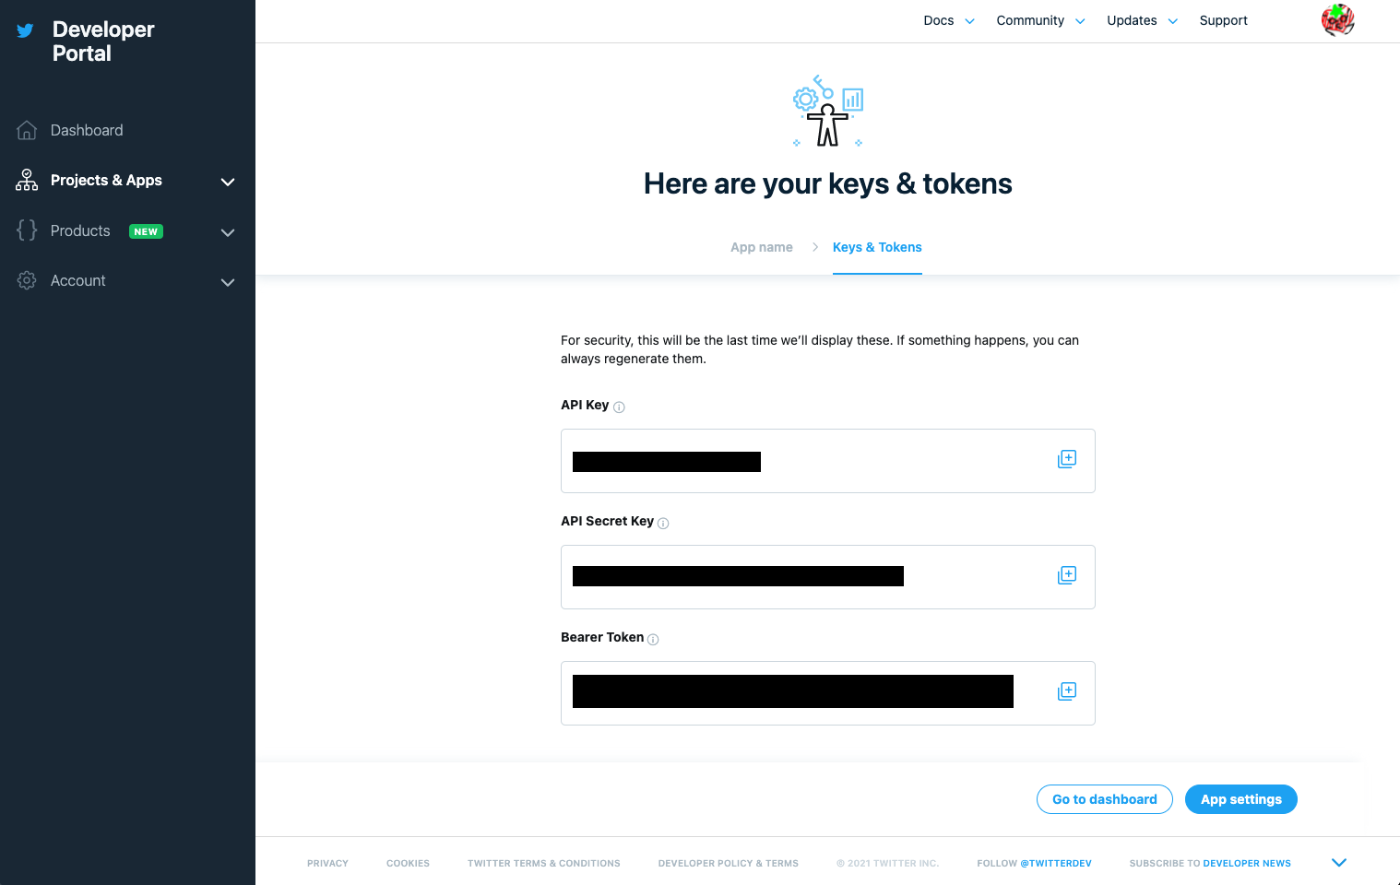
Appを作成した後に表示される API Key, API Secret Key, Bearer Token は忘れないようメモしておきましょう。
https://developer.twitter.com/en/portal/apps/new
認証方法
Twitter API は用途に応じて認証方法が異なっています。
https://developer.twitter.com/en/docs/authentication/overview
OAuth 1.0a
こちらは、クライアントアプリなど自分以外のユーザーがログインして使用する場合に必要となる認証方法です。
ユーザーにログインを求める形式のアプリはこちらを利用する形となります。
ログインを挟むため、少し複雑な方法でAPIを使うために必要な情報を取得する必要があります。

※ PIN-Based OAuth の場合
OAuth 2.0
こちらは、ログインせずに情報の取得のみを行いたう場合に使用する認証方法です。
ローカルやサーバー上でログイン状態に関係しないデータを取得するシステムはこちらを利用する形となります。
こちらは、ログインを挟まないため、発行した Bearer Token を指定するだけでAPIを利用することが可能となります。

oauth1: ^2.0.0
oauth1 を使うことで OAuth 1.0a に則った処理を行うことができます。
https://pub.dev/packages/oauth1
AccessTokenを取得
import 'package:flutter/material.dart';
import 'package:oauth1/oauth1.dart' as oauth1;
import 'package:url_launcher/url_launcher.dart';
void main() {
runApp(MyApp());
}
class MyApp extends StatelessWidget {
Widget build(BuildContext context) {
return MaterialApp(
title: 'Flutter Demo',
theme: ThemeData(
primarySwatch: Colors.blue,
),
home: MyWidget(),
);
}
}
class MyWidget extends StatefulWidget {
_MyWidgetState createState() => _MyWidgetState();
}
class _MyWidgetState extends State<MyWidget> {
final controller = TextEditingController();
final platform = oauth1.Platform(
'https://api.twitter.com/oauth/request_token',
'https://api.twitter.com/oauth/authorize',
'https://api.twitter.com/oauth/access_token',
oauth1.SignatureMethods.hmacSha1,
);
final clientCredentials = oauth1.ClientCredentials(
'API Key をここに設定',
'API Key Secret をここに設定',
);
late final auth = oauth1.Authorization(clientCredentials, platform);
oauth1.Credentials? tokenCredentials;
void initState() {
super.initState();
// CallbackURLを"oob"とすることでPINでの認証とできる
auth.requestTemporaryCredentials('oob').then((res) {
tokenCredentials = res.credentials;
// launch() で ログイン用URLを開く
launch(auth.getResourceOwnerAuthorizationURI(tokenCredentials!.token));
});
}
Widget build(BuildContext context) {
return Scaffold(
body: Center(
child: Column(
mainAxisAlignment: MainAxisAlignment.center,
children: [
// ログイン後に表示されたPINを入力
TextFormField(
controller: controller,
),
ElevatedButton(
onPressed: () async {
// 入力されたPINを元に Access Token を取得
final pin = controller.text;
final verifier = pin;
final res = await auth.requestTokenCredentials(
tokenCredentials!,
verifier,
);
print('Access Token: ${res.credentials.token}');
print('Access Token Secret: ${res.credentials.tokenSecret}');
// 取得した Access Token を使ってAPIにリクエストできる
final client = oauth1.Client(
platform.signatureMethod,
clientCredentials,
res.credentials,
);
final apiResponse = await client.get(
Uri.parse(
'https://api.twitter.com/1.1/statuses/home_timeline.json?count=1'),
);
print(apiResponse.body);
},
child: Text('OK'),
),
],
),
),
);
}
}
タイムラインを取得
final client = oauth1.Client(
  platform.signatureMethod,
  clientCredentials,
  oauth1.Credentials(
    'Access Token をここに設定',
    'Access Token Secret をここに設定',
  ),
);
final res = await client.get(
  Uri.https(
    'api.twitter.com',
    '/1.1/statuses/home_timeline.json',
    {'count': '1'},
  ),
);
final body = jsonDecode(res.body);
print(body);
Tweetを検索
final client = oauth1.Client(
  platform.signatureMethod,
  clientCredentials,
  oauth1.Credentials(
    'Access Token をここに設定',
    'Access Token Secret をここに設定',
  ),
);
final res = await client.get(
  Uri.https(
    'api.twitter.com',
    '/1.1/search/tweets.json',
    {
      'q': 'flutter',
      'lang': 'ja',
      'count': '1',
    },
  ),
);
final body = jsonDecode(res.body);
print(body);
その他API
この他にも提供されているAPIは沢山あるので詳しくは公式ドキュメントを確認してみましょう。
